Often our most useful instruments or devices slip our concern that these things also require some take care. After years of support, they keep backing us up without asking much in return. The equation is the same for your favorite workbench.
Years of stains, dents, and damages barely let us repair the workbench as it seems a complicated task. But the truth is, a simple touch-up and paint could make the workbench feel like a completely new one.
Just give a few hours. You’ll get an almost new workbench without putting much effort into it. We’ll take you through a few steps so that you can know how to paint a workbench.
How to Paint a Workbench Efficiently?
We’ve carefully detailed out 9 steps to paint your workbench easily and properly. Without further adieu, let’s get down in exploring.
Decide to Paint
The very first step of painting your workbench would be deciding whether to paint it or not. If it has dents, damages, scratches, and the previous color is no longer pleasing you, you’re good to do the painting.
Painting is perhaps the easier replacement of a new workbench as a whole. But be certain about a valid reason before jumping into painting.
Choose Color
Secondly, fix a color you want to paint it in. You can keep the same color as the previous one or change it as per your choice. But our recommendation would be to stick to off-white or gray, or any deep color where dust, spot, and scratches would be less visible.
Fixing
Till this point, everything was in papers and brain. Now it’s time to get on the ground. For better finishing, it’s necessary to check for dents, holes, and deep scratches.
After identifying, you’d try to fix those with putting or filler depending on the damage type. Then, try to make it even with the surface of your bench and smoothen the surface.
Cleaning
As the bench gets involved in so many projects, it’s recommended to do clean it perfectly. If there’s anything left on the surface like dust, grease, stains, etc., it’ll reduce the effectiveness of the paint.
Try out the best cleaners to your knowledge and clean off all the tiniest spots that you think might cause trouble. After cleaning, let it dry for a while and get ready for the painting task.
Use Sealer or Primer
To get the best result in the paint, you can use sealer or primer. Though the primer nowadays is used in almost all places, we suggest you go for a sealer. Sealer offers great support to adhere the color with wood elements compared to the primer.
So, it’s better to stay on the safe side.
Choose the Best Paint
The paint you’ll be using on the workbench can’t be a random one. Paints selected randomly mightn’t adhere to the wood board at all. Leaving you with tons of regrets.
You can try out some of the best latex indoor paints that are also suitable for plywoods. When choosing the paint, make sure it’s easy to apply and doesn’t require a complex process of mixing and applying.
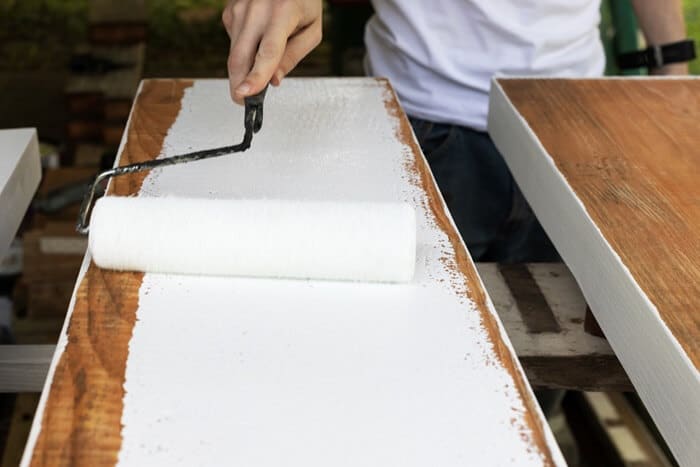
Get a Roller
You can choose one among roller, spray, and brush for painting, but a roller is recommended for more satisfying work. It’ll give you a better finishing touch than other alternatives.
Work Process
As the surface of the board is extensively used, we suggest you go for a double coating.
Start the painting by painting all the corners very carefully. When the corners are well covered, soak the roller well with the paint and start covering the middle part. Don’t overdo it, as after drying the first coating, you can add another layer.
Wait for at least 4-6 hours, and don’t touch it until it gets dried out completely. After drying, go for the second coating.
In the second coating, apply the paint carefully. Don’t add a thick layer on one side and a thin layer on the other. All the sides should be even and well finished.
Let it dry once again for a day, and it’ll be ready for use in no time.
Smooth It Out with Sandpaper
Most of us prefer a very smooth finish on our workbench surface. If a smooth surface is on your bucket list, you can use sandpaper and smoothen the surface out for a more comfortable texture.
After the paint has dried properly, you can take a 400 grit sandpaper and prepare your desired workbench surface.
Thus, you’re completely done with your workbench painting process.
Frequently Asked Question(FAQ)
Can I paint workbench?
Yes, you can paint your workbench within a matter of a few hours and make it feel like a completely new one.
How do you maintain a woodworking bench?
To properly maintain your woodworking bench, you have to keep it clean, keep your elements organized and separate and stay careful about the nailing and cutting jobs.
What is workbench used for?
A workbench is a strong solid table specially prepared for woodwork and other DIY projects with comfort.
How do you fill a hole in a workbench?
The material used for filling up a workbench whole depends on what type of hole it has. For small dents and holes, you can try out putting or filler. For larger holes, we’ll recommend you to go for two-part epoxy for a solid repair.
Final Words
Painting your workbench could be troublesome if you haven’t done many painting jobs yourself previously, but after learning how to paint a workbench, you can surely be the painter of your new workbench.
One more thing to reaffirm is that your workstation’s new color would surely rejuvenate you from within every time you see it. So, don’t postpone it any longer. Add it to the to-do list of this weekend and get over with it.